
Process of GST Registration in India

Registering for GST in India is now very simple and fully online. The Ministry of Finance has made the GST registration process easy so that more businesses can file their taxes without any trouble.
If your annual turnover is more than ₹20 lakh (or ₹40 lakh or ₹10 lakh, depending on your state and the type of goods/services you offer), you must register for GST.
Explore more about GST…

GSTR-1/1A Filing Update May 2025: Mandatory Document Reporting of HSN Code in GSTR 1
GSTR-1/1A Filing Update May 2025: Mandatory Document Reporting of HSN Code in GSTR 1
GSTR-1/1A Filing Update May 2025: Mandatory Document Reporting of HSN Code in GSTR 1 The GST portal has introduced important changes in …

Process of GST Registration in India
Process of GST Registration in India
Process of GST Registration in India Registering for GST in India is now very simple and fully online. The Ministry of Finance …

Latest GST Rates in India for Goods & Services
Latest GST Rates in India for Goods & Services
Latest GST Rates in India for Goods & Services Understanding the latest GST rates is essential for businesses and consumers alike. The …
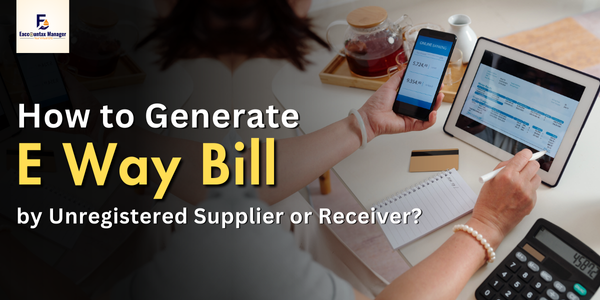
How to Generate E Way Bill by Unregistered Supplier or Receiver?
How to Generate E Way Bill by Unregistered Supplier or Receiver?
How to Generate E Way Bill by Unregistered Supplier or Receiver? Guidance on Form ENR-03: Enrolling Unregistered Dealers/Persons for e-Way Bill Generation …

Note on New GST Rate for real estate
Note on New GST Rate for real estate
Note On New GST Rate For Real Estate GST Council has approved a transition plan for a 5% rate on Other Than …
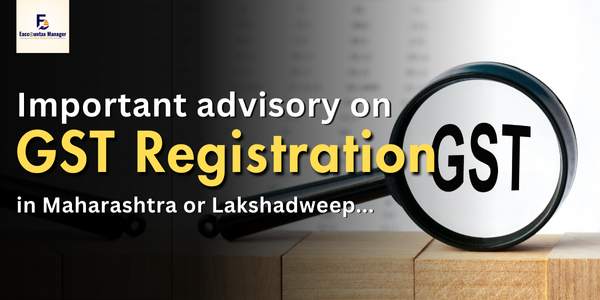
Important advisory on GST Registration in Maharashtra or Lakshadweep on 8th February 2025
Important advisory on GST Registration in Maharashtra or Lakshadweep on 8th February 2025
Important advisory on GST Registration in Maharashtra or Lakshadweep on 8th February 2025 If you want to register for GST in Maharashtra …
Latest Updates About GST You Should Know!
17th April 2025
The CBIC has issued Central Tax Instruction No. 03/2025-GST to guide GST officers on processing registration applications. It emphasizes the importance of adhering to document requirements, preventing unnecessary queries, ensuring timely approvals, and verifying the business location through physical checks when necessary. For more details, you can refer to the official advisory.
12th February 2025
The GSTN released an advisory related to new Aadhaar and biometric authentication requirements for GST Registration. There are three categories:
- Applicants not opting for Aadhaar authentication
- Applicants opting for Aadhaar Authentication with biometric verification are required
- Application Reference Number (ARN) non-generation
Applicants must adhere to the advisor’s instructions. Read this.
Confused about how to register for GST?
Get your GST registration today!
Ready to grow your business? Get your GST registration today!
Click Here
Steps to Fill Part A of the GST Registration Application
Step 1: Visit the GST Portal
- Go to gst.gov.in.
- Click on Services, then Registration, and then choose New Registration.
Step 2: Create Your TRN (Temporary Reference Number)
Now, fill out Part A:
- Choose New Registration.
- Under “I am a,” select Taxpayer.
- Pick your State and District.
- Enter your Business Name and Business PAN number.
- Add your Email ID and Mobile Number.
(If your PAN already has mobile and email linked, you don’t need to enter them again.) - You’ll receive OTPs (one-time passwords) on your email and mobile.
- Click on Proceed.
Step 3: Verify OTP and Generate TRN
- Type in the OTPs you got on your mobile and email.
- Click Continue.
Step 4: TRN Generated
- You’ll now receive a 15-digit Temporary Reference Number (TRN).
- It will also be sent to your registered email and mobile number.
- Make sure to note it down!
- You need to finish filling out Part B of the application within 15 days.
Step 5: Log in Using TRN
- Go back to the GST Portal.
- Click New Registration again.
- Choose Temporary Reference Number (TRN).
- Enter your TRN and captcha code.
- Proceed & Next.
Step 6 – Verify OTP
- You’ll get an OTP (One Time Password) on your registered mobile number and email (or PAN-linked contact details).
- Just enter the OTP and click Proceed.
Step 7 – Check Your Application Status
- Now, you’ll see that your application is saved as a draft.
- Click on the small Edit icon to continue.
Steps to Fill Part B of the GST Registration Form
- A recent Photograph
- Proof of Business (like a rent agreement or electricity bill)
- Business Constitution Documents (like partnership deed or company registration certificate)
- Bank Details (optional at the time of registration)
- Aadhaar Authentication (if you choose it)
Note: Submitting bank details is not mandatory anymore since 27th December 2018.
Step 8 – Fill in Your Business Information
- Enter your Trade Name (this is the name you use for your shop or business — it can be different from the legal name).
- Choose if you want to join the Composition Scheme (Yes/No).
- Mention whether you are a Manufacturer, Service Provider, or any other type.
- Enter the Date your Business Started and the Date when you became liable for GST.
- Select ‘Yes’ and pay the advance tax as per GST rules if you are registering as a Casual Taxable Person.
- Choose the Reason for Registration — for example, if you are an Input Service Distributor or any other reason.
- If you are related to a SEZ (Special Economic Zone), you will need to give SEZ approval details and upload the required documents.
- Fill in details about any Previous Registrations (like CST, Excise, or Service Tax) if you had any.
When you fill a section correctly, the box will turn blue, so you’ll know it’s done!
Step 9 – Add Promoter or Partner Information
- You can add details of up to 10 Promoters or Partners.
- Fill in their Personal Information like Name, Address, Mobile Number, Date of Birth, Gender, PAN, Aadhaar, etc.
- Upload a photo of each person (only 1 MB size allowed, in PDF or JPEG format).
- If a Promoter is also your Primary Authorized Signatory, select the right option.
- Click Save & Continue when done.
Step 10 – Add Authorized Signatory Details
- Now, fill in the details of the person who will handle GST matters (similar to Promoter details).
- If using a GST Practitioner, enter their Enrollment ID.
- If you have an Authorized Representative, just fill in their basic information.
Step 11 – Enter Details for Your Main Business Location.
This is the main place where you run your business — where your important documents and records are kept.
It could be your office, shop, or even your home (if you work from there).
Here’s what you need to do:
- Enter the full address – district, sector/ward, division code, and range code.
- Add your official phone number.
- Mention if the place is rented, owned, or shared.
Upload the supporting documents: - If it’s a rented place, upload a rent agreement or No Objection Certificate (NOC).
- If it’s an SEZ (Special Economic Zone) location, upload the SEZ approval too.
- Select the type of business activity done at this place (like manufacturing, trading, etc.).
Important:
If you are applying on behalf of a company under insolvency (CIRP), you must give original registration details too.
Document Upload Tip:
- If you have multiple documents, combine them into one PDF (or JPEG) file.
- Maximum file size allowed: 1 MB
- You can upload up to two files.
- Click Save & Continue once you’re done.
Step 12 – Add Details of Goods and Services
- Now, tell me what goods or services you sell or provide.
- Add up to 5 top goods and 5 top services.
- Pick the right HSN Code (for goods) or SAC Code (for services).
Step 13 – Add Your Bank Account Details (Optional)
You can add up to 10 bank accounts, but it’s optional right now.
(Earlier it was mandatory, but not anymore since December 2018.)
If you skip it now, don’t worry — after getting your GSTIN, the portal will remind you to update your bank details later.
If you choose to add now:
- Enter bank name, branch, account number, and IFSC code.
- Upload a copy of your bank passbook or statement.
Step 14 – Fill State-Specific Information
Depending on your state, you may need to enter:
- Professional Tax Employee Code
- PT Registration Certificate Number
- State Excise License details (if you deal in liquor, etc.)
- Fill in whatever is applicable and Save & Continue.
Step 15 – Aadhaar Authentication
Next, decide if you want to do Aadhaar authentication.
✅ If you complete Aadhaar authentication, the officer usually won’t visit your place for physical verification (makes the process faster!).
Just follow the steps shown — it’s quick and safe.
Step 16 – Final Verification of Application
Now, you need to verify and submit the application.
You can submit it in three ways:
- Using DSC (Digital Signature Certificate) – for Companies/LLPs (mandatory)
- Using e-Sign – OTP will come to your Aadhaar-linked mobile number.
- Using EVC (Electronic Verification Code), OTP will come to your registered mobile number.
- Tick the declaration box and submit!
Step 17 – ARN is Generated
- After submission, you’ll immediately get an Application Reference Number (ARN).
You’ll also receive it on your registered mobile number and email. - You can easily track your application status at any time on the GST portal by entering your ARN.
That’s it! You’ve successfully applied for GST registration.
Now just wait for approval.
Book Your Appointment Today!

Conclusion
In conclusion, GST registration in Rajasthan is a straightforward online process that offers multiple benefits like ease of interstate trade and tax credits. It helps businesses stay compliant, making it easier for growth and smooth operations. To simplify this, consider expert services to guide you through the process.
Why Choose E Accountax Manager?
At E Accountax Manager, we offer hassle-free and professional GST registration services in India. Our team ensures the entire process is smooth, saving you time and effort. With our expertise, you can be sure your business stays compliant with tax laws, and we guide you through each step of GST registration.
Whether you’re a startup or an established business, our personalized service ensures a seamless experience for every client. Choose us for reliable, efficient, and cost-effective GST registration support!
Learn about the GSTR Filing Update in May 2025…
Facebook
Youtube
Whatsapp
Instagram
X-twitter
Pinterest
Linkedin
FAQs
1. Who Needs to Register for GST?
1. If you were already registered under old tax laws like Excise, VAT, or Service Tax.
2. your business turnover is more than ₹40 lakh, ₹20 lakh, or ₹10 lakh, depending on where you are located.
3.If you are a Casual Taxable Person (doing seasonal or occasional business) or a Non-Resident Taxable Person.
4. If you are an agent selling on behalf of others or an Input Service Distributor.
5. If you are paying tax under the Reverse Charge Mechanism.
6. If you sell products or services through an e-commerce platform (like Amazon, Flipkart, etc.).
7. If you are an e-commerce platform owner yourself.
8. If you are providing online services or data from outside India to people living in India.
Basically, if you are doing any of these activities, you must get your GST registration!
2. How Much Does GST Registration Cost?
GST registration on the government portal is free!
You just need to:
3. Why Should You Get GST Registered?
GST registration comes with lots of advantages. Let’s break it down:
If you are a normal registered business:
If you are under the Composition Scheme:
If you choose to register voluntarily (even if you earn less than ₹40 lakh):
GST registration not only ensures you stay compliant with tax laws but also boosts your business growth by opening up new opportunities, including easier access to interstate trade and tax benefits.
4. Can I Apply for GST Registration Offline?
No, you can’t.
GST registration is completely online. You must apply on the government website: gst.gov.in. But don’t worry! If you find it confusing, you can always take help from a GST Suvidha Kendra or a trusted GST expert near you.
5. What Documents Do You Need for GST Registration?
Before you start, keep these documents ready:
✅ Tip:
Make sure all your documents are clear, up-to-date, and easy to upload!
Consult Today!
*Wait after entering details; you’ll be redirected to book an appointment.
Categories
Recent Posts
Latest News
Learn more…
GSTR-1/1A Filing Update May 2025: Mandatory Document Reporting of HSN Code in GSTR 1
GSTR-1/1A Filing Update May 2025: Mandatory Document Reporting of HSN Code in GSTR 1
GSTR-1/1A Filing Update May 2025: Mandatory Document Reporting of HSN Code in GSTR 1 The GST portal has introduced important changes in …
Process of GST Registration in India
Process of GST Registration in India
Process of GST Registration in India Registering for GST in India is now very simple and fully online. The Ministry of Finance …

How to Register For EPF Online?
How to Register For EPF Online?
CA Chetan Agarwal
•
Labour Law
How to Register For EPF Online? If you want to give your employees the benefits of PF, you need to register for …

Who is Eligible for ESI Registration in Rajasthan?
Who is Eligible for ESI Registration in Rajasthan?
CA Chetan Agarwal
•
Labour Law
Who is Eligible for ESI Registration in Rajasthan? If you run a business in Rajasthan, you might have heard about ESI registration. …

What is a Public Limited Company?
What is a Public Limited Company?
CA Jitendra Agarwal
•
Business
What is a Public Limited Company? If you’re planning to start a big business or want to raise money from the public, …

What is A Private Limited Company?
What is A Private Limited Company?
CA Jitendra Agarwal
•
Business
What is A Private Limited Company? If you’re planning to start a business, you’ve probably heard the term “Private Limited Company.” But …

How to Get Money Lending License?
How to Get Money Lending License?
CA Jitendra Agarwal
•
Business
How to Get Money Lending License? Are you planning to start a money lending business in India? If yes, then getting a …

Micro Finance Company: Benefits, Taxation, & its Challenges
Micro Finance Company: Benefits, Taxation, & its Challenges
Microfinance Company: Benefits, Taxation, & its Challenges Microfinance companies play a big role in helping people who can’t easily get services from …
Latest GST Rates in India for Goods & Services
Latest GST Rates in India for Goods & Services
Latest GST Rates in India for Goods & Services Understanding the latest GST rates is essential for businesses and consumers alike. The …

How to Start One Person Company in India?
How to Start One Person Company in India?
CA Jitendra Agarwal
•
Business
How to Start One Person Company in India? Thinking of starting your own business, but don’t want partners? A One Person Company …